Braking. It’s important. I bought JagWire RoadPro complete cables with shift and brake cables and housing. It comes with everything needed including endcaps, but not the tools or know-how. Those items one must bring to the party. It’s a BYOB and you are the mechanic. In this case, I would be t he mechanic.
Also ordered for this excursion into brake install town was a
XLC Pro Cable and Housing Cutter. Now I am quite handy around the house and can manage many jobs that would put some girls and guys to shame or disgust, but I respect the brakes and have found it a tricky job in the past. Hence a couple of nights spent waiting for my goods to arrive spent watching You-Tube instructional videos in preparation. I found great videos on You-Tube from the Global Cycling Network (GCN). In fact I watched way more videos than needed because they were so much fun!
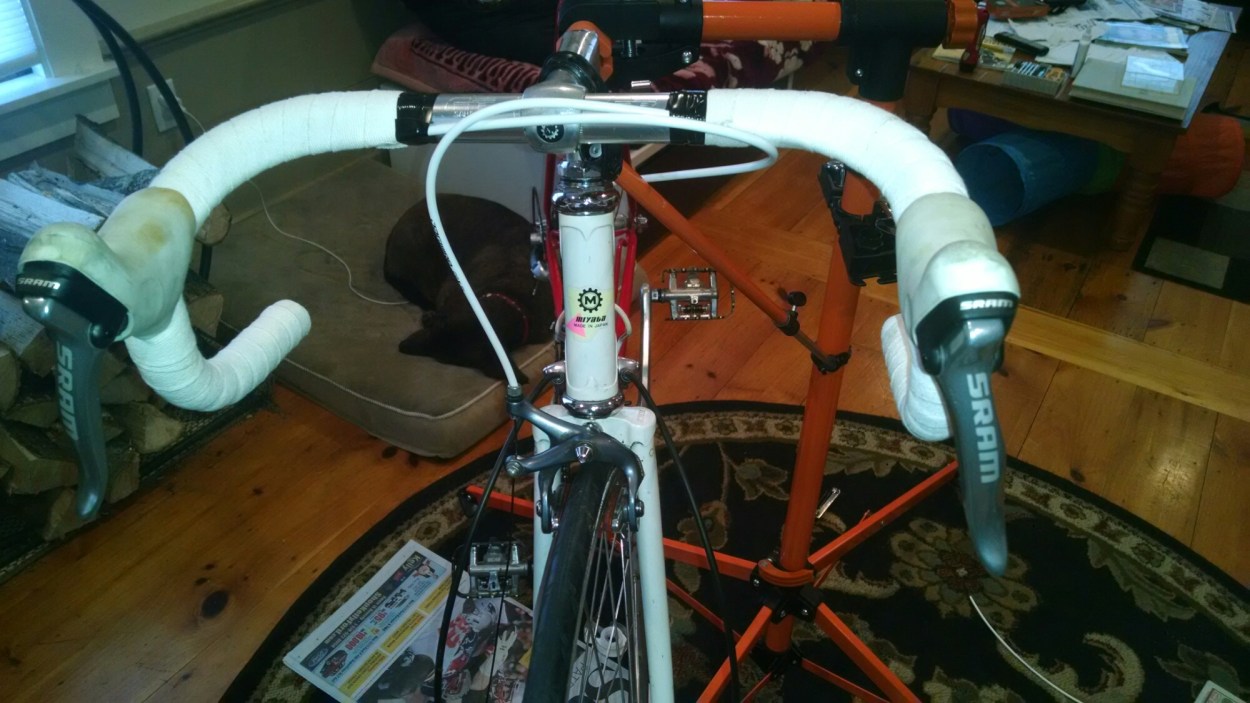
I had upgraded my brake levers a few years past to SRAM, even though I am not also running gear cabling. I love these brake levers ergonomics so much! They are a perfect extension of my arm and dropbar.
Threading the wire through them was not too tricky. The wire is a lot like water – it seeks it’s own level, or in this case, outlet. It would take a bit of trickery to thread the wire through the miyata top tube. First I had to learn that the cable housing for this system is much bigger than my vintage bike was prepared for. That sent me on a weekend trip to Woody’s for a length of cable that would suit; also in white. This would allow me to stuff it’s end into the top tube inlet and outlet. Getting the wire out required the use of a tool to fish out the cable. The cable has a bit of stiffness that makes it press against the bottom of the tube. To get it up and out, one must stop the end slightly forward of the outlet and then lift it up. I used a plastic computer tong that I had from years past when I was working and studying to become a computer professional.
The cable takes a short piece of housing from the outlet to the brakek where it sits with or without an endcap in the brake coupling. Pull it through to the correct brake tension, tighten the locking nut. Snip and cap it off if you’re certain it’s correct. I wasn’t, so I left off the cap in case I had to make adjustments. I was glad that I did. I had forgotten to lube the cable before running it through the housing so my brakes stuck a little bit. I had to pull everything out – this was only the rear brake – lube and then repeat the same operation.
The front brake was a breeze after all that I learned on the rear brake phase. After it was complete, I pulled out my new white cloth tape, also ordered from Amazon, and started wrapping. In the way way back times before carbon, we used to wrap starting at the inside. Now the directions say to start from the bar end. First I tried it the old school way, but I did not make it all the way to the end. So I started again from the bar end and wrapped, but did not make it all the way. It took a third try where I stretched very hard, that I was able to get the tape all the way to the correct point on the handlebar. Even so, I did not have enough tape to taper it, so I taped it, as I would have anyway, and there you have it.
I learned so much about my abilities and about fixing bikes so far. I learned that fear can be a motivator for learning, and that learning dissipates fear, rather breeding attention to detail. I learned that confidence also comes with learning and stretching past one’s comfort level. Wow! All that and all I had to do was get my hands dirty. Lastly I learned that the right tool for the job eases the task dramatically …. but when I think about it, that lesson is really about learning and attention to detail too!

I have to say that I enjoyed what I would describe as the Miyata cronicles. I’m way behind where you are mechanically speaking, but your writing is encouraging. I’ve been riding for some time now, but largely left the mechanical fixes to the pros. A couple years ago I purchased a bike from a store in NY and it was shipped to me needing some assembly. A friend offered and he and I put the bike together. The experience was inspiring enough to for me to purchase a work stand. Although very limited, I am starting to do a few more things myself. Your writing provides further encouragement.
Great job both writing and wrenching.
LikeLike
Thank you! I have a similar background, having been riding for years, but usually leaving the wrenching for the pros, with a couple of valiant efforts in between. I learned so much working on the Miyata that I can’t believe I’ve waited so long to take ownership of my basic mechanical needs until recently. I have more tales to tell about the Miyata restoration. There are some really great videos on YouTube. You should definitely check them out if you need help or encouragement. Thanks so much for commenting and ride on!
LikeLike